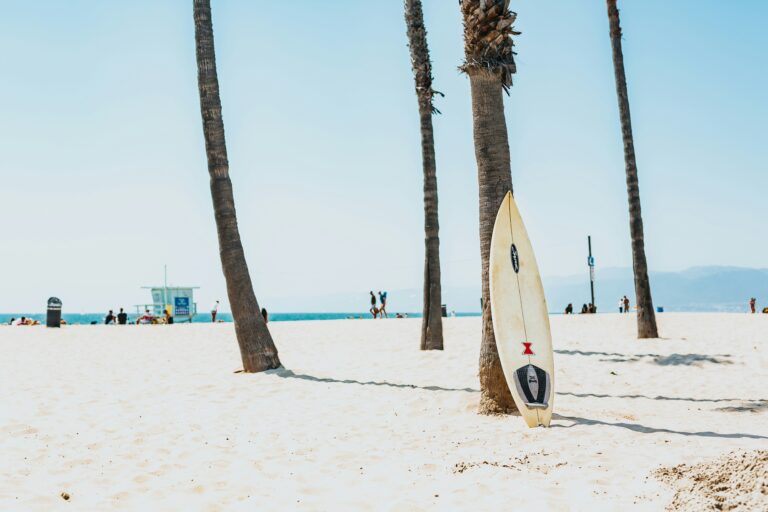
You know that sinking feeling when you walk into your garage and see your prized surfboard leaning awkwardly against the wall, slowly warping under its own weight? Or worse, when you notice that fresh ding from when it slipped and hit the concrete floor last week? Yeah, I’ve been there too. That board cost you a small fortune, and proper storage shouldn’t be an afterthought.
Here’s the reality – your surfboard is more than just a piece of equipment. It’s your gateway to those perfect dawn patrol sessions, your ticket to catching that wave of the day. Taking care of it when you’re not riding it is just as important as waxing it before a session. Whether you’re a weekend warrior with one trusty shortboard or a collector with a quiver that would make Kelly Slater jealous, how you store your boards matters.
Let’s dive into everything you need to know about surf racks and storage solutions that’ll keep your investment safe, your space organized, and your boards ready to rip whenever the surf calls.
Why Proper Surfboard Storage Actually Matters
Before we get into the specifics of racks and storage systems, let’s talk about why these matters. I used to think my boards were tough enough to handle whatever – they take a beating in the ocean, right? Wrong thinking.
Temperature and UV damage are silent killers. Leave your board in direct sunlight or a hot car, and you’re looking at delamination, yellowing resin, and weakened foam. I learned this the hard way when I left my favourite fish in my truck on a summer day. The result? A warped rail and $200 in repairs.
Pressure points and warping happen when boards rest on the same spot for extended periods. Gravity isn’t your friend here. Store a board flat on the ground for months, and you might notice a subtle rocker change that affects performance.
Moisture and Mold are real concerns, especially if you’re storing boards in a garage or shed. Saltwater trapped in a ding combined with humid conditions creates the perfect environment for delamination and rot.
Accidental damage is probably the most common issue. Boards falling over, getting knocked by passing cars, or having things fall on them – it happens more than you’d think. One of my friends lost a beautiful custom board when his lawnmower tipped over onto it in the garage.
Proper storage eliminates all these risks while keeping your boards accessible and your space organized. Now let’s get into the solutions.
Understanding Your Storage Needs
Not everyone’s situation is the same, and that’s perfectly fine. Before you start shopping for racks or building storage solutions, take a minute to assess your specific needs.
How many boards do you own? If you’re a one-board minimalist, a simple wall mount works perfectly. Got a quiver of five or more? You need something more substantial. I’ve got seven boards ranging from a 5’6″ fish to a 9’2″ longboard, so my storage needs are complex.
Where can you store them? Garage, spare room, balcony, shed, or even your living room (hey, no judgment – surfboards are art). Your location determines what type of storage system makes sense and what weatherproofing you might need.
How often do you surf? Daily surfers need quick-access storage where grabbing a board is effortless. Weekend warriors can get away with more elaborate storage systems that prioritize space-saving over convenience.
What’s your budget? Storage solutions range from $15 DIY racks to $500+ premium systems. The good news is that effective storage doesn’t have to break the bank.
Do you rent or own? Renters need to think about wall damage and portability. Homeowners can go nuts with permanent installations.
Indoor Storage Solutions
Let’s start with indoor options since they offer the best protection from the elements.
Wall-Mounted Racks
Wall-mounted racks are probably the most popular storage solution, and for good reason. They maximize vertical space, look clean, and keep boards easily accessible.
Single board racks are perfect for minimalists or as a display piece for your favourite board. These typically consist of two foam-padded arms that cradle the board’s rails. Installation is straightforward – find a stud, drill, mount. Just make sure you’re mounting into solid wood studs, not drywall. I made that mistake once and came home to a board on the floor and a hole in my wall.
The key with single racks is spacing. Mount them at least 18 inches apart vertically to allow for different board sizes and easy removal. I like to mount mine at varying heights to create visual interest while accommodating different board lengths.
Multi-board wall racks are where things get interesting. These systems can hold anywhere from 3-6 boards and come in various configurations. Some use individual padded arms, others use a rail system with adjustable cradles.
Look for racks with soft foam or rubber padding to prevent pressure dings. The arms should be angled slightly upward to prevent boards from sliding off. Horizontal storage (boards parallel to the wall) saves floor space, while vertical storage (boards perpendicular to the wall) is easier to access.
Pro tip: Install your wall rack so the bottom board sits at least 12 inches off the ground. This protects against accidental kicks and makes cleaning easier.
Freestanding Racks
If drilling holes in walls isn’t your thing, freestanding racks offer flexibility and portability.
Tower racks are vertical storage solutions that lean against a wall or stand independently. They typically hold 3-5 boards and have a small footprint. The catch is they can be top-heavy, so make sure they’re stable. Some models come with anchor points to secure them to walls for extra safety.
I’ve got a bamboo tower rack in my bedroom (yes, really) that holds four boards and doubles as a conversation piece. Guests either think it’s cool or think I’m obsessed. Both are accurate.
Floor stands are simple A-frame or T-shaped stands that hold 1-2 boards. They’re perfect for rental situations or temporary storage. The downside is they take up floor space and can be easily knocked over by kids, pets, or clumsy surfers rushing to get out the door.
Leaning racks are another option that combines the simplicity of floor stands with multi-board capacity. These typically lean against a wall at an angle and can hold 4-6 boards. They work great in garages where wall space is limited.
Ceiling Racks
Ceiling storage is brilliant for maximizing space in garages or storage areas with high ceilings.
Overhead hoists use a pulley system to lift boards up to the ceiling. They’re genius for long-term storage of boards you don’t use frequently. Installation requires ceiling joists strong enough to support the weight, so do your homework before drilling.
Suspended racks hang from the ceiling and hold boards horizontally. They’re great for garages where you need to preserve wall and floor space for other stuff. The tricky part is making sure they’re high enough to clear your car but low enough that you can reach your boards without a ladder.
One thing to watch with ceiling storage – make sure you’re not storing boards directly under a hot attic space in summer. Heat rises, and you don’t want your boards cooking up there.
Storage Racks with Shelves
Hybrid storage solutions that combine board racks with shelving for wax, fins, leashes, and other accessories are incredibly practical.
These typically feature board storage on one side and cubbies or shelves on the other. It’s a great way to keep your entire surf setup organized in one place. You can store your wetsuit, grab your board, and head out without hunting for gear scattered across the house.
Outdoor Storage Solutions
Sometimes indoor storage isn’t an option. If you’re storing boards outside, weatherproofing becomes critical.
Weatherproof Storage Sheds
Dedicated surf sheds are becoming increasingly popular, especially in surf-heavy areas. These range from simple plywood boxes to elaborate wooden structures with ventilation, lighting, and organization systems.
The key elements for outdoor board storage:
- Ventilation to prevent moisture buildup
- UV protection through opaque walls or covers
- Security with solid locks
- Elevation to keep boards off potentially wet ground
- Temperature regulation through insulation or ventilation
I’ve seen some incredible DIY surf sheds that people have built in their backyards. One buddy built a cedar shed with slatted walls for airflow, hooks for wetsuits, and even a small rinse station. It’s nicer than some people’s houses.
Balcony and Patio Racks
If you live in an apartment with a balcony, you can still store boards outside with the right setup. Wall-mounted racks work well if you can drill into the exterior wall. Otherwise, freestanding racks that can be secured against railings are your best bet.
The critical thing is using a board sock or bag for UV protection. Even indirect sunlight can damage boards over time. And obviously, secure everything well – you don’t want a gust of wind sending your longboard into the neighbour’s window.
Car Racks and Transportation Storage
Getting your boards to and from the beach safely is just as important as home storage.
Roof Racks
Soft roof racks are budget-friendly and work on almost any car. They use straps to secure pads to your roof, and you strap your boards on top. They’re perfect for occasional surfers or road trips.
Hard roof racks with locking systems offer better security and aerodynamics. Brands like Thule and Yakima dominate this space, and for good reason – they’re built to last. The investment pays off if you surf regularly.
Key considerations for roof racks:
- Pad your boards with board bags or socks to prevent dings and wax transfer
- Secure straps properly – loose boards are dangerous projectiles
- Consider aerodynamics – boards should face fins forward
- Lock everything if you’re leaving boards on your car
I learned my lesson about proper strapping when I nearly lost a board on the highway. The whistling sound still haunts me.
Truck Bed Racks
If you drive a pickup truck, you’ve got options. Bed-mounted racks keep boards secure while maintaining access to your truck bed. Some systems are removable, which is nice when you need the full bed for other stuff.
Tailgate pads are simple, affordable solutions that protect boards resting against your tailgate. They’re popular with surfers who have multiple boards or surf with friends. Just back up to the beach, drop the tailgate, and everyone grabs their board.
Interior Racks
For station wagons, vans, and SUVs, interior racks maximize space while keeping boards protected from weather and theft. These typically mount to existing seat tracks or cargo hooks.
I’ve got a custom setup in my old van where I mounted PVC pipe cradles to the ceiling. It holds four boards perfectly and keeps them out of the way. Total cost? About $30 and an afternoon of work.
DIY Storage Solutions
Not everyone wants to drop a few hundred bucks on commercial racks. If you’re handy, DIY solutions can be just as effective.
PVC Pipe Racks
PVC pipe is the surfer’s best friend for DIY projects. It’s cheap, easy to work with, and naturally gentle on boards.
A basic PVC wall rack requires:
- PVC pipe cut to appropriate lengths
- Foam pipe insulation for padding
- Mounting brackets
- Wood screws
- A drill
The beauty of PVC is you can customize it to your exact needs. Want to hold six boards? Add more arms. Got a weird wall space? Adjust the design. Need it to be portable? Skip the wall mounting and create a freestanding version.
I built my first PVC rack ten years ago, and it’s still going strong. Cost me less than $20, took an hour to build, and has held up through multiple moves.
Wooden Racks
If you’ve got woodworking skills, building a wooden rack lets you create something both functional and beautiful. Cedar and redwood are popular choices because they naturally resist rot and insects.
A simple wooden rack design uses 2x4s for the frame and dowels wrapped in foam for the board cradles. You can stain or paint it to match your space, add shelves for accessories, and customize dimensions for your exact needs.
The satisfaction of storing your boards on something you built yourself is awesome. Plus, it’s a great conversation starter.
Surfboard Hooks
Sometimes simple is best. Heavy-duty J-hooks or U-hooks mounted to wall studs can hold boards individually. Just add foam padding to protect the rails, and you’ve got functional storage for under $5 per board.
The trick is mounting them at the right height and spacing. I use this method for my daily driver boards because it’s quick – grab and go without fussing with racks or stands.
Rope and Pulley Systems
Got high ceilings? A simple rope and pulley system can hoist boards up and out of the way. This is old-school, but it works. Use soft rope or webbing to avoid damaging boards and make sure your anchor point is solid.
Protecting Boards During Storage
Having the right rack is only half the battle. How you prepare and maintain boards in storage matters too.
Cleaning Before Storage
Always rinse boards thoroughly with fresh water before long-term storage. Saltwater left to dry can cause corrosion on fins and hardware. Check for any dings or damage and repair them before storing – water seeping into foam through even tiny cracks leads to bigger problems.
Remove wax if you’re storing boards for more than a few weeks. Old wax collects dirt and can melt in warm conditions, making a mess. Plus, starting each season with fresh wax is part of the ritual, right?
Using Board Bags and Socks
Even in perfect storage conditions, board bags add an extra layer of protection. Day bags protect against dust and minor dings. Travel bags offer padding for long-term storage or when boards are stored in less-than-ideal conditions.
I keep all my backup boards in simple board socks. They’re lightweight, breathable, and provide UV protection. For my daily boards, I skip the bags to save time.
Climate Control
Ideally, store boards in a climate-controlled environment between 60-80°F. Extreme temperature swings cause expansion and contraction that can lead to delamination.
If climate control isn’t possible, at least avoid direct sunlight and try to minimize temperature extremes. A shaded garage is better than a metal shed that turns into an oven in summer.
Regular Inspections
Even in storage, check your boards periodically. Look for signs of delamination, pressure dings, or pest damage (yes, mice have been known to nest in board bags – ask me how I know).
Rotate board positions occasionally if you’re storing multiple boards on top of each other. This prevents any single board from bearing weight for too long.
Small Space Storage Hacks
Living in a small apartment or house doesn’t mean you can’t own multiple boards. You just need to get creative.
Vertical storage is your friend. Mount boards vertically (tail down) to minimize floor space. A 6-foot board mounted vertically takes up way less room than one stored horizontally.
Behind doors is dead space waiting to be used. Mount slim racks behind bedroom or closet doors for hidden storage.
Under beds works for shortboards and fish designs. Get some pool noodles or foam blocks to elevate boards slightly, preventing pressure points.
Corner racks maximize awkward spaces. That weird corner in your bedroom or living room? Perfect for a corner-mounted rack.
Decorative display – if you can’t hide them, feature them. A beautiful wooden wall rack with your favourite boards becomes functional art. I’ve seen living rooms where surfboards are the primary decor element, and it looks awesome.
Seasonal Storage Considerations
Storage needs change with the seasons, especially if you live in an area with distinct summer and winter surf seasons.
Winter Storage
If you’re storing boards through winter in a cold climate, make sure they’re in a temperature-controlled space if possible. Extreme cold can make foam and resin brittle.
This is when you do thorough repairs, maintenance, and even consider selling boards you no longer use. Winter is board shopping season, so it’s also when your collection might grow.
Summer Storage
Heat is the enemy in summer. Keep boards out of hot attics, cars, and direct sunlight. Ensure good ventilation in storage areas to prevent moisture buildup.
If you’re traveling for extended periods, consider climate-controlled storage units for valuable boards. It might seem excessive, but it beats coming home to delaminated boards.
Off-Season Rotation
I rotate my quiver seasonally. Summer boards go to easily accessible spots while winter boards move to longer-term storage. This keeps my most-used boards handy while protecting the full collection.
Budget Considerations
Let’s talk money because storage solutions vary wildly in price.
Budget Options ($0-$50)
DIY PVC racks, basic wall hooks, and simple floor stand fall into this category. These work perfectly well for most surfers. My first five years of surfing, I used exclusively DIY and budget storage, and my boards were fine.
Don’t let anyone tell you that you need expensive storage solutions. A $15 set of foam-padded J-hooks from the hardware store protects your board just as well as a $200 designer rack.
Mid-Range Options ($50-$200)
Commercial wall racks, quality freestanding racks, and decent car roof racks live here. This is where you get better materials, nicer aesthetics, and improved functionality.
If you’re a regular surfer with multiple boards, investing in this range makes sense. You’re getting durability and features that budget options lack.
Premium Options ($200+)
High-end storage systems, automated ceiling racks, custom-built storage sheds, and premium transportation systems occupy this tier.
Are they worth it? If you’ve got a large collection, valuable custom boards, or just want the best – absolutely. But most surfers don’t need to spend this much to properly store their boards.
What I Recommend Spending
For most surfers with 2-4 boards, I’d suggest budgeting $100-150 for home storage and $100-200 for car racks if you need them. That gets you solid solutions that’ll last years and protect your investment.
Remember, a $150 storage system that prevents a $300 ding repair pays for itself quickly.
Common Storage Mistakes to Avoid
Let me save you from some costly errors I’ve made or witnessed over the years.
Storing boards flat – never store boards lying flat for extended periods. The weight causes pressure points and potential warping. Always use racks or cradles that support the board’s natural shape.
Ignoring UV exposure – even indirect sunlight yellows resin and weakens foam over time. If your storage area has windows, use board bags or move boards away from light sources.
Over-tightening straps – whether on racks or car roof racks, over-tightening creates pressure points that can damage boards. Snug is good; tight enough to leave impressions is bad.
Forgetting about fins – storing boards with fins pointed toward walls or floors risks bending or breaking fins. Always position boards so fins have clearance.
Stacking too many boards – limit stacks to 3-4 boards maximum and always use padding between boards. I once stacked six boards together and the bottom one developed a pressure ding.
Storing wet boards – always dry boards thoroughly before storage. Trapped moisture leads to Mold and delamination.
Neglecting security – if your storage area is accessible to others, secure your boards. Board theft is real, and replacing a stolen board hurts more than you’d think.
Using inappropriate spaces – avoid storing boards in areas with extreme temperature fluctuations, high humidity, or pest problems.
Organizing Your Surf Gear Beyond Boards
While we’re talking storage, let’s address the full surf setup. Boards are just part of the equation.
Wetsuit Storage
Hang wetsuits properly on wide hangers to maintain shape. Never ball them up or leave them in a car. I use a dedicated wetsuit hanger with shoulder support to prevent stretching.
Some surfers install a separate section of their board rack with wetsuit hooks. Others use bathroom shower rods for temporary drying before moving suits to closets.
Fin Storage
Fins are expensive and easy to lose. I use a small plastic bin with dividers to organize fins by type. Label them if you’ve got multiple sets – when you’re rushing to get to dawn patrol, you don’t want to be hunting for your favourite thruster setup.
Wall-mounted fin racks are also available, displaying fins like a quiver. It’s practical and looks cool.
Leash, Wax, and Accessories
A simple shelf or cubby system keeps small items organized. I’ve got a plastic bin for wax (organized by temperature), another for leashes (comp, regular, longboard), and hooks for rash guards and accessories.
Some commercial board racks include built-in storage for these items, which is super convenient.
Surf Tools and Repair Kits
Keep your ding repair supplies, fin keys, wax combs, and other tools in one place. A small toolbox or fishing tackle box works perfectly.
Trust me, having everything organized means you’ll do those small repairs instead of ignoring them until they become big problems.
Making Storage Part of Your Routine
Good storage isn’t just about having the right racks – it’s about developing habits that protect your equipment.
Post-surf routine: Rinse board → Check for damage → Dry thoroughly → Store properly. Make this automatic, and you’ll prevent most storage-related issues.
Weekly checks: Glance at your stored boards weekly. Look for any changes, check strap tension, ensure nothing’s fallen or shifted.
Monthly deep checks: Once a month, pull boards down, inspect thoroughly, clean your storage area, and reorganize if needed.
Seasonal overhaul: When seasons change, do a complete gear assessment. Repair dings, deep clean everything, reorganize based on what you’ll be using.
Making these routines habitual takes the thinking out of it. Your boards stay in great shape, and you’re always ready when the surf calls.
The Bottom Line on Surf Storage
Here’s what it comes down to – proper storage isn’t optional if you care about your equipment and your investment. A surfboard that’s well cared for will last years longer than one that’s neglected.
You don’t need to spend a fortune. A simple DIY rack or budget wall mount protects your board just as effectively as premium systems. What matters is using any storage system correctly and consistently.
Think about your specific situation: how many boards, where you can store them, how often you surf, and what your budget allows. Then choose a solution that fits. Start simple and upgrade as your collection grows or your needs change.
The best storage system is the one you’ll use every time. If it’s too complicated or inconvenient, you’ll start leaning boards against walls and skipping the routine. Keep it simple, make it accessible, and commit to the habit.
Your boards have given you countless hours of stoke. Return the Favor by giving them a proper home when they’re not in the water. Whether that’s a fancy custom rack or a simple PVC creation, just make sure you’re protecting your investment year-round.
Now get out there and organize that quiver. Those boards aren’t going to store themselves, and dawn patrol is waiting.
Have questions about surf storage or want to share your setup? Drop a comment below – I’d love to hear what solutions work for you!